 Searching...
Tips for creating a gorgeous mural within the home
)
A mural is a fantastic way to add interest and colour to a space. Our Talented Style Guides are fans of murals, but you don’t have to be a pro to get this fabulous feature. Whether you’re in the mood for something bold and bright or looking for something more neutral and natural, the great thing about murals is that you can make them your own.
Our tips below will help you on your journey to painting the mural of your dreams.
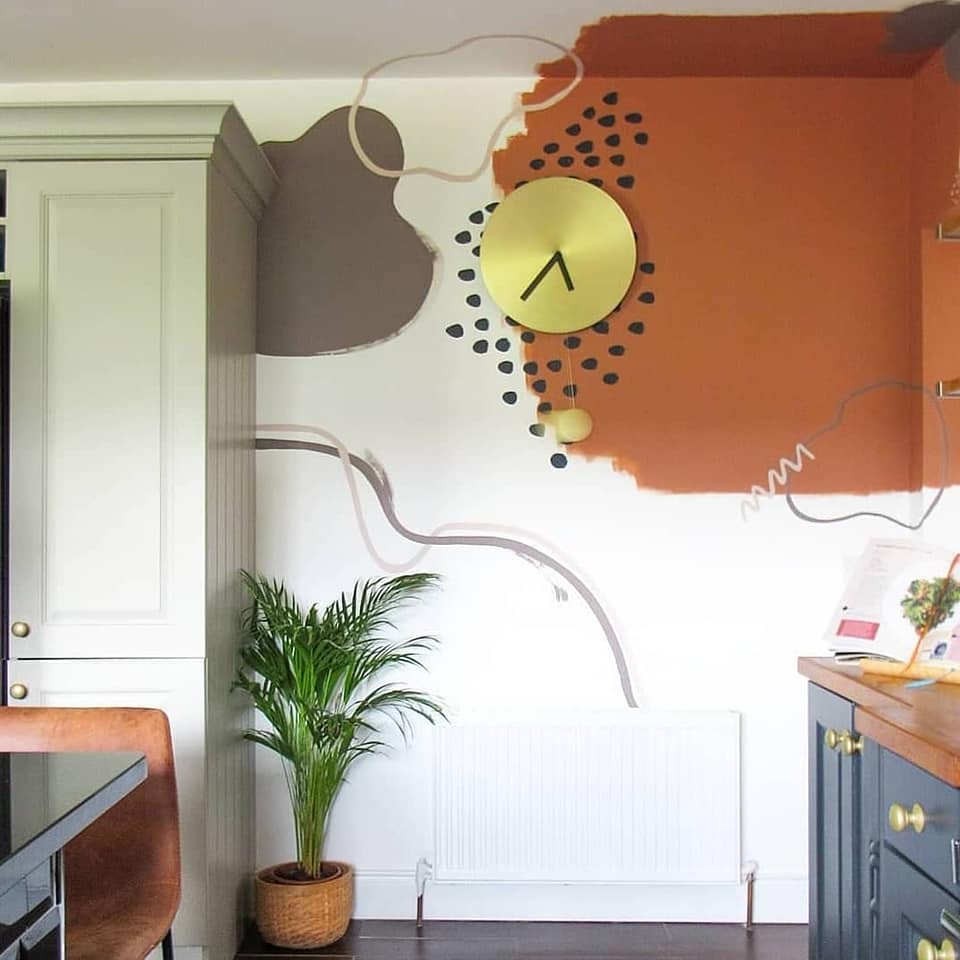
A mural made by our Style Guide Alannah
Start with a strong foundation: As any artist will tell you, a good foundation is the key starting point for every masterpiece. Make sure that the wall you’ll be painting on is smooth and even in colour. Fill in any holes and give the area a fresh base coat from which your mural will grow. For this base coat, as well as for the rest of your mural, we recommend a matt finish so that the light won’t reflect and skew the look of the mural or make it more difficult to see in detail. Your base coat should be a complementary colour to the rest of your mural- it doesn’t have to be white by any means, but you should certainly be aware of how this backdrop will work with the rest of the colours you choose to use and the rest of your home.
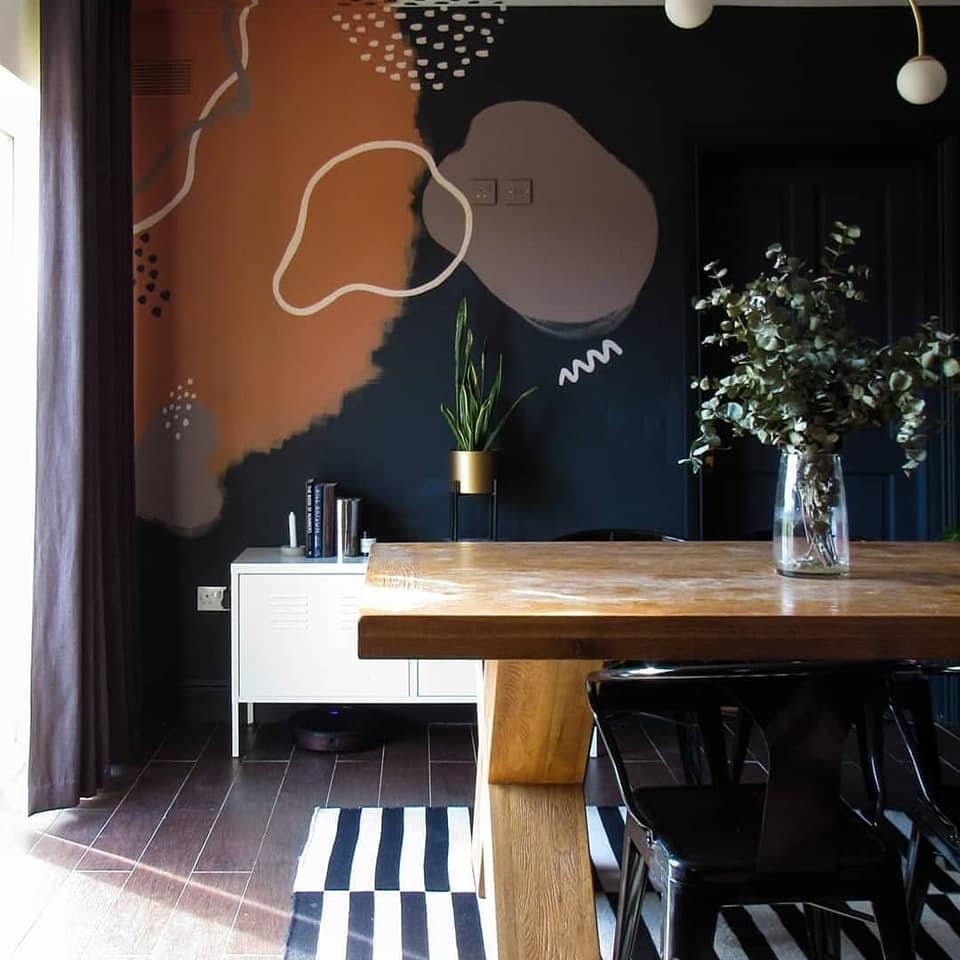
A mural made by our Style Guide Alannah
Prepare your design: In most cases, you should know what you’re going to paint before you begin your mural. Obviously though if you want to freestyle, go for it! Many mural artists swear by the grid method. To use this method, you’ll sketch out your design on paper and then you’ll draw a grid over the image using a ruler and a soft pencil. Next, you’ll draw a grid of the same proportions and the same amount of boxes on your mural wall. Using your grid to guide you, pencil in the pre-drawn design onto your wall. Even if you’re using stencils, mark the general region where they should be sitting so you’ll make sure it looks just how you want it.
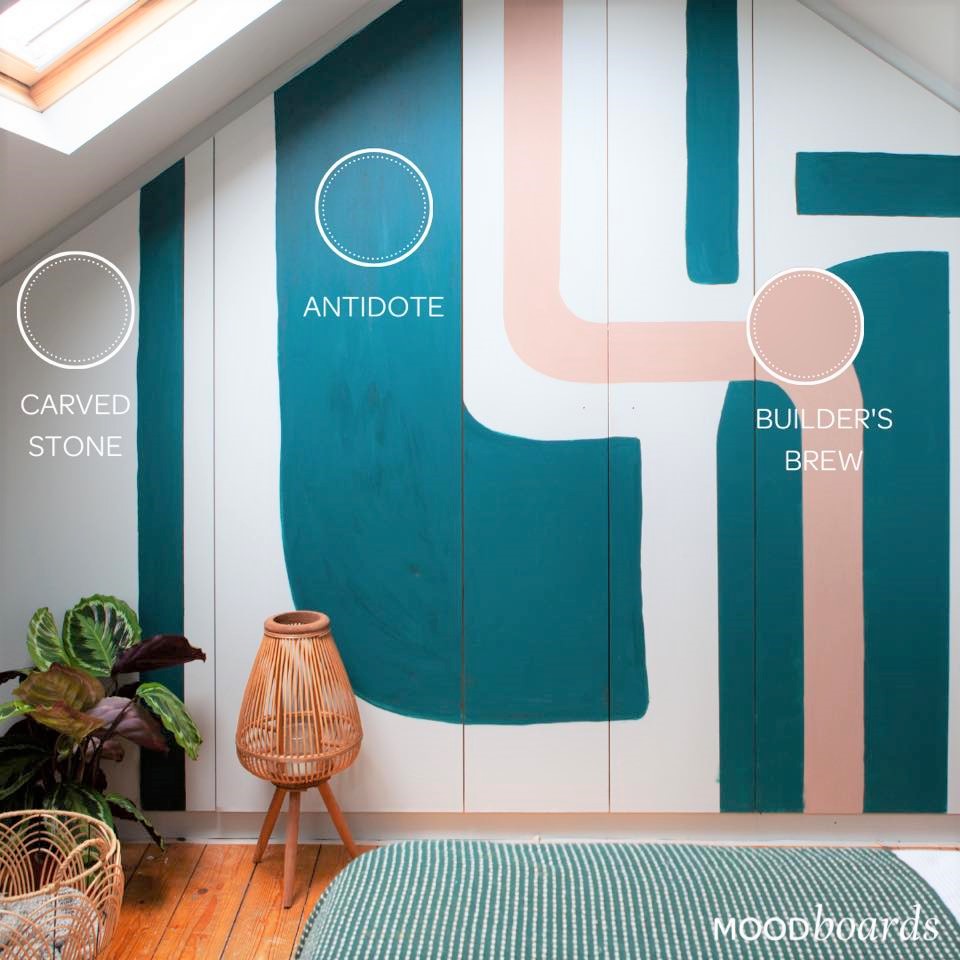
A mural made by our Style Guide Cathy
Protect the area: Completing your mural will take some time. During this process, it’s crucial to know that you’ll not only have easy access to your mural, but that your project won’t be disturbed by outside factors (including curious little hands). Clear the area of furniture so you have more room to create and place a drop cloth around your project to shield your floor and carpets. Ensure that anyone else who shares your space is aware of the situation and will steer clear of the area.
A mural made by our Style Guide Alannah
Use quality materials: As mentioned previously, you’ll want to use a good quality matt interior paint so that the reflection of light doesn’t interrupt your design. Depending on how big your mural is and how much of a given colour you’ll need, our tester pots may come in handy— you can get a wide range of gorgeous colours without having to purchase a large amount of each. Testers for our new MoodBoards range can be mixed for you at any one of our Colourmixing stockists. Also make sure that you use good quality brushes— this will make your painting experience much easier for you. Be sure to have various sizes of brushes on hand so that you can create as much detail on your mural as you’d like.
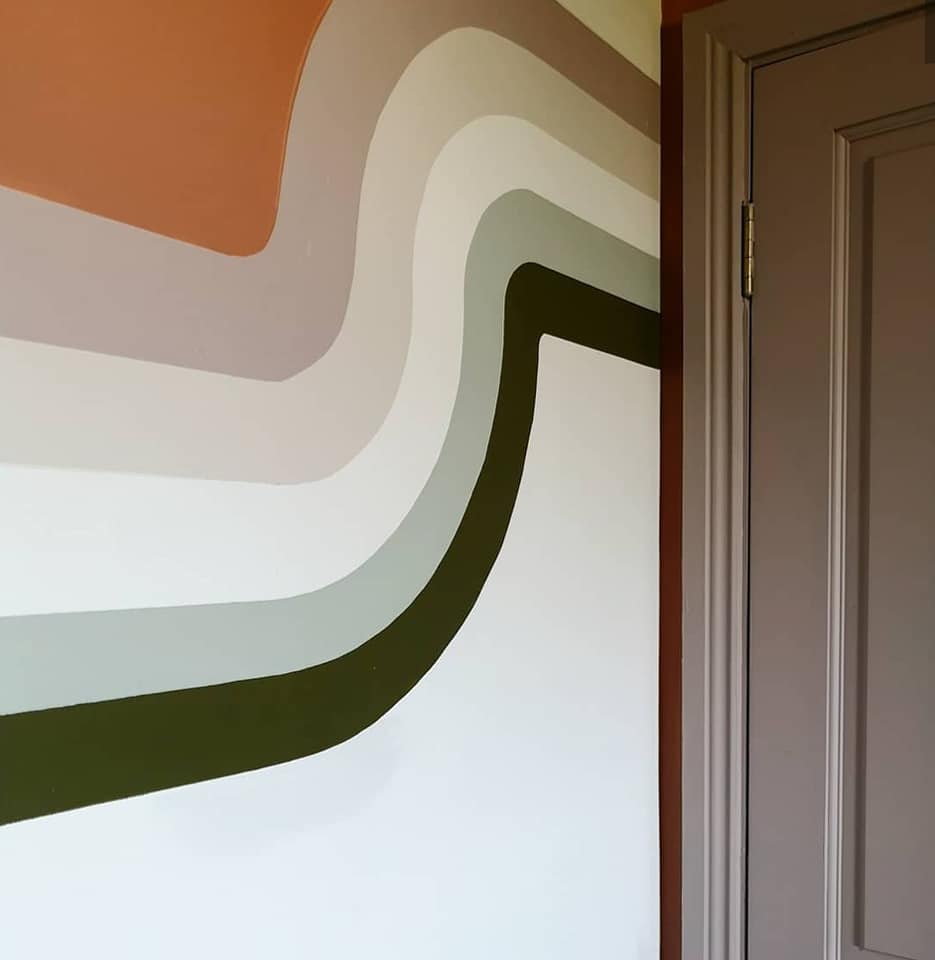
A wall design made by our Style Guide Frieda
Ensure you’re on the right track throughout the process: To make sure that your mural is coming along like it should, be sure to step back from time to time and check to ensure that everything is looking like you want it. You won’t get the full picture when you’re right up to the wall, so you’ll need to put some space between you and your work so that you can get a better perspective.
Use a protective clear finish to seal your mural: You may want an extra layer of protection to your mural, though this is not always necessary. For this, most interior mural artists recommend a clear, water-based archival matte varnish.
Now who’s ready to go create? The above tips will help get your mural off on the right foot! Check out your local Crown Paints Stockist for materials to get you started, and visit us on the web for more inspiration.